EQing Modern Metal Guitars: The Ultimate Guide
Nail The Mix Staff
The modern metal guitar tone – it’s a complex beast. We crave that thick, wide, and brutally percussive sound that remains articulate even when tuned to the depths of Drop F and drenched in layers of gain. Yet, so often, the quest for this sonic behemoth leads to a muddy, fizzy, or undefined mess that either gets completely lost in the mix or, worse, bulldozes everything else into oblivion. If you’ve ever battled to make your low-tuned guitars both heavy and clear, you know the struggle is real.
Enter EQ, your primary weapon in sculpting guitar tones that don’t just sound heavy but are also defined, aggressive, and sit perfectly in a dense metal arrangement. This isn’t just about slapping on a preset and calling it a day, nor is it solely about “fixing” problems. EQ is your chisel to carve out space, your brush to add character, and your secret to unlocking the full devastating potential of your metal guitars. For insight into how a creative philosophy of intentional unpredictability shapes every technical and artistic decision, see how Devin Townsend approaches songwriting to stay creatively alive.
Today, we’re diving deep into the trenches of guitar EQ for mixing modern metal. We’ll cover foundational moves like aggressive high-passing, tackling the ever-present “mud,” understanding the crucial role of mid-range for aggression and note definition, taming that top-end fizz, the strategic use of EQ before and after your distortion, and how to make layered guitars sound like a unified army of aggression. For a masterclass in nuanced layer blending from one of metal’s most respected producers, see Jens Bogren’s approach to mixing Leprous’ rhythm guitar layers into a cohesive wall of sound. For a real-world example of the opposite challenge—differentiating lead guitars from rhythm guitars when they share the same baked-in tone—see how Dave Otero crafts space for Allegaeon’s leads.
The Foundation: Clearing the Path for Low-End Domination
Before you even think about boosting frequencies for aggression, you need to lay a clean and solid foundation. For modern metal guitars, this almost always starts with some serious house cleaning in the low end.
High-Pass Everything (No, Seriously, Everything)
This might sound extreme, especially when you’re chasing that “heavy” sound, but high-passing your low-tuned metal guitars is often non-negotiable. Here’s why: For a masterclass in splitting a DI signal into multiple amp sim paths to achieve both sub-bass weight and midrange grind independently, see Forrester Savell’s layered bass tone approach for Karnivool.
- Headroom Hog: Guitars, especially with high gain and low tunings, can generate a surprising amount of sub-bass energy. This unnecessary low-end rumble eats up valuable headroom in your mix and fights directly with the actual bass guitar and the punch of your kick drum.
- Finding the Sweet Spot: The key is to find the cutoff frequency that removes the problematic sub-bass without making the guitars sound thin or weak. You might be surprised how high you can go – 80Hz, 100Hz, even 120Hz or higher isn’t uncommon, especially depending on the tuning, the number of guitar layers, and the role of the guitars in that specific section. The golden rule? Always listen in the context of the full mix. The goal is to retain the perception of weight and power, not necessarily all the literal sub frequencies from the guitars themselves.
More info: High Pass vs Low Pass Filter: Your Key to a Modern Metal Mix
Conquering the “Mud Monster” (The Dreaded Low-Mids)
This is where many metal guitar tones go to die a slow, undefined death. The “mud zone,” typically lurking somewhere between 200Hz and 500Hz, is notorious for making heavy guitars sound boomy, congested, and lacking in articulation.
- Identify the Problem: Listen for notes that jump out unnaturally, especially during palm-muted sections, or an overall “woofy,” “boxy,” or congested sound that obscures the detail of the riffs.
- Surgical Strikes, Not Broad Demolition: The solution isn’t usually a massive, wide scoop across the entire low-mid range – that can leave your guitars sounding hollow and lifeless. Instead, think surgically. Use a parametric EQ with a relatively narrow Q (bandwidth) to find the specific offending frequencies that are causing the most mud, and then carefully attenuate them. Sometimes, just a few decibels of reduction at the right spot can make a world of difference.
Actionable Tip: Use an EQ plugin that has a spectrum analyzer to help you visually identify potential frequency build-ups in the 200-500Hz range. Then, temporarily boost a narrow band on your EQ and sweep it through this area. When a particularly ugly or resonant frequency “honks” or “booms” out, you’ve likely found a culprit. Make a mental note of it, then try a precise cut there. Always, always check your changes in the context of the full mix to ensure you haven’t removed too much warmth or body. For another workflow approach, see how Jamie King uses personalized EQ reference curves to speed up mix prep on The Contortionist.
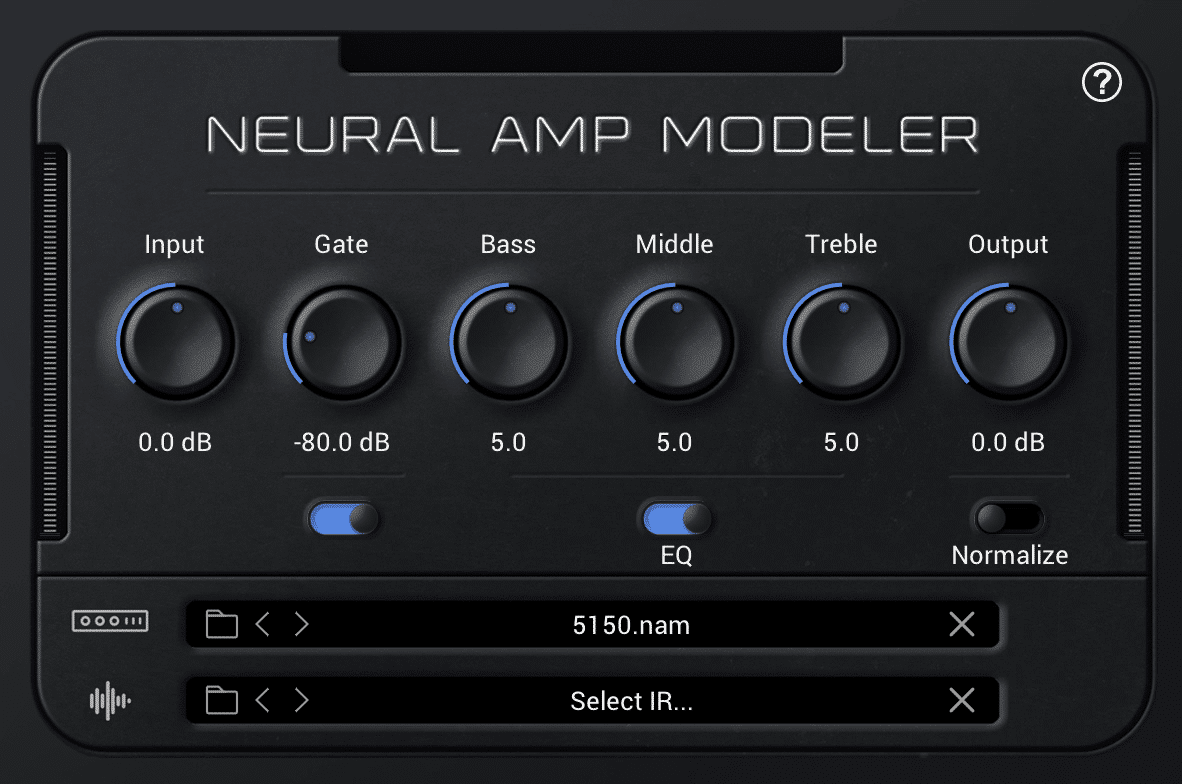
The right IR (impulse response) can also make a huge difference if you’re using amp sims.
Mid-Range: The Secret to Aggression and Articulation
For decades, a common piece of metal guitar advice was to aggressively “scoop the mids.” While that might have worked for certain old-school tones, in the context of a dense, modern metal mix, your mid-range is actually your best friend for achieving aggression, punch, and all-important note definition.
The “Scooped Mids” Myth: Time to Bury It
Let’s be clear: heavily scooping all your mids is generally a recipe for a guitar tone that sounds hollow, lacks power, and gets completely lost in the mix. The mid-frequencies are where the core character, pick attack, and much of the discernable note information of your guitar reside. Losing them means losing impact.
Finding Your Guitar’s “Voice” in the Mids
Instead of indiscriminately scooping, think about which aspects of the mid-range you want to enhance:
- Pick Attack & Clarity (Upper Mids: ~1.5kHz – 4kHz): This is where the percussive “chink” of your pick hitting the strings lives, and it’s crucial for making fast, articulate riffs cut through. A careful boost in this area can bring your guitars forward and add a real sense of aggression and clarity.
- Aggression & “Grind” (Mids/Low Mids: ~700Hz – 1.5kHz): This frequency range often contains the “growl,” “chunk,” and raw power of a heavy guitar tone. Too much can make your guitars sound “honky” or nasal, but the right amount adds undeniable authority and aggression.
- Avoiding “Honk” and “Cardboard”: While mids are good, be cautious of over-boosting narrow bands, which can lead to unpleasant resonant peaks. Wider, more musical boosts are often more effective for tonal shaping.
Contextual Mid-Range EQ
The ideal mid-range shape isn’t static. It will change based on the specific amp or amp sim you’re using, the guitar’s tuning (lower tunings might need more help in the upper mids to stay defined), and whether it’s a rhythm guitar part that needs to be punchy or a lead guitar that needs to sing.
Actionable Tip: Take one of your rhythm guitar tracks. With the full mix playing, try a moderate boost (2-4dB) with a medium Q somewhere in the 2kHz to 3kHz region. Listen carefully to how it affects the pick attack, the clarity of fast palm-muted passages, and how the guitar sits against the bass and drums. Sweep the frequency and adjust the Q and gain by ear until it feels right – more aggressive, more defined, but not harsh.
More info:
- How to record guitars in Pro Tools
- How to mix low-tuned guitars
- How to mix palm-muted guitars
- How to use delay on guitars
- How to use reverb on guitars
- Henrik Udd’s EQ approach on Architects guitars
- Using Cubase Auto Fade to eliminate click artifacts on metal guitar edits (Emmure)
Some choice sessions to check out:
- Mixing BRUTAL Knocked Loose Guitars w/ Will Putney
- Deconstructing Tosin Abasi’s Guitar Sound In Animals As Leaders “Red Miso”
- Mixing Polyphia’s ridiculous bass guitars
Highs & Fizz: Presence, Air, or Ice Pick?
The high frequencies of a metal guitar tone are a delicate balancing act. You want enough top-end to provide presence, string detail, and “air,” but too much can quickly lead to a harsh, thin, and fatiguing sound, often plagued by that dreaded digital “fizz.”
Adding “Cut” and “Air” (Presence & High Shelf)
- A boost in the presence range (often somewhere between 5kHz and 8kHz) can bring out string detail, pick noise, and help the guitars cut through a busy mix without necessarily making them louder.
- A gentle high-shelf boost (say, from 10kHz upwards) can add a sense of “air” and openness to the tone, making it feel less congested.
Taming the Dreaded “Fizz” and Harshness
- High-gain tones, especially those coming from some digital amp sims or certain mic and cab combinations, can suffer from an unpleasant, static-like “fizz” in the very high frequencies (typically 7kHz and above). This can make your guitars sound artificial and grating.
- The solution is often a gentle low-pass filter (rolling off everything above, say, 10-12kHz, or even lower depending on the severity) or making targeted, narrow cuts to specific fizzy frequencies.
- Crucial Tip: Always check your high-frequency EQ moves on multiple speaker systems and headphones. Fizz that isn’t obvious on your main studio monitors might be painfully apparent on smaller consumer speakers or earbuds.
More info:
- Zenith Passage Guitar Tones: Amp Sims, Custom IRs & EQ Insights
- What Are The Best Metal IRs for Guitar Tone?
- Thornhill Guitar Tones: George Lever’s In-The-Box Mixing Chain
- Best Free VST Plugins for Metal Producers
- A Guide to Neural Amp Modeler (NAM)
Balancing Brightness
It’s a fine line. Too much overall high-end makes guitars sound thin, brittle, and can lead to listener fatigue very quickly. Too little, and they’ll sound dull, lifeless, and buried under the cymbals.
Actionable Tip: If your guitars are sounding harsh but you don’t want to lose overall brightness, before reaching for a de-esser or a broad high-frequency cut, try sweeping a very narrow EQ band with a significant boost through the 3kHz to 5kHz region. You might find a specific resonant peak that’s causing most of the harshness. A precise, narrow cut at that exact frequency can often solve the problem much more effectively and transparently than a wider EQ move. For general fizz, a gentle high-shelf cut starting around 8-10kHz or a subtle low-pass filter can be your friend.
Strategic EQ in the Signal Chain: Pre vs. Post Distortion
Where you place your EQ in the guitar signal chain has a massive impact on the final tone, especially when high-gain distortion is involved. Understanding the difference between pre-distortion and post-distortion EQ is fundamental to crafting professional metal guitar sounds.
Pre-Distortion EQ: Shaping What the Amp “Sees”
EQing your direct input (DI) signal before it hits your physical amp, amp simulator plugin, or distortion pedal is one of the most powerful tone-shaping techniques in metal. The EQ choices you make here will dramatically alter how the amp or distortion circuit reacts and generates harmonics.
- The Classic “Tighten Up” Move: This is essential for modern metal. By using a high-pass filter on the DI signal (e.g., cutting everything below 80-120Hz), you remove unnecessary low-end mud before it gets amplified and distorted. This results in a much tighter, more focused, and less “flubby” distorted tone, especially crucial for fast palm-muted riffs on low-tuned guitars.
- Mid-Boosting for Aggression (The Tube Screamer Effect): The iconic sound of a Tube Screamer pedal in front of a high-gain amp comes largely from its characteristic mid-range boost, slight low-end cut and light compression. Replicating this with an EQ on your DI – boosting the mids (often around 700Hz-1kHz) – can make the amp distort those frequencies more intensely, leading to a tighter, more articulate, and aggressive sound that cuts through the mix.
- Producer Buster Odeholm’s approach often involves significant DI manipulation before it even hits an amp sim, including using whammy pedals for pitch shifting. While not strictly EQ, this highlights the immense power of processing the DI signal before the main gain stage to fundamentally alter the character of the sound that gets distorted.
Post-Distortion EQ: Refining the Result
Once your DI signal has been re-amped or run through an amp sim, post-distortion EQ is used for further refinement and to make the guitar sit correctly in the overall mix. This is typically where you’ll do:
- More precise mud removal.
- Fizz taming.
- Boosting presence or air.
- Making cuts to create space for other instruments like vocals or snare. For a real-world example of a multi-stage post-distortion approach, see how Acle Kahney layers surgical EQ, dynamic EQ, and parallel processing on Tesseract guitars.
The Interaction
It’s important to understand that these two EQ stages are not independent; they interact. A change you make to your pre-distortion EQ will affect how the amp/sim distorts, which in turn will change what your post-distortion EQ needs to do. Experimentation is key.
Actionable Tip: Grab a raw guitar DI signal. Place an EQ plugin before your favorite amp sim. Try a high-pass filter at around 100Hz and then experiment with a 3-6dB boost using a medium Q somewhere between 700Hz and 1.2kHz. Pay close attention to how the character of the amp sim’s distortion changes – how the low-end tightens up, how the pick attack becomes more pronounced. Then, add another EQ plugin after the amp sim to make any further refinements needed to fit it into a test mix.
More info:
- Mixing Meshuggah’s “Future Breed Machine” Lead Guitars w/ Daniel Bergstrand
- Bring Me The Horizon Guitar Tone: Fredman Micing + EQ Hacks You Need to Try
- Building Nickelback’s HEAVY Guitars: Sims, Layers & Mix Tricks
- How Animals As Leaders are redefining modern metal guitar
- Neural DSP: The Ultimate Guide to Crafting Crushing Metal Tones
- Recording Metal Guitar: A Guide to Low Tunings & Tone
- Spiritbox Plugin: How Mike Stringer Gets His Guitar Tone
- Bilmuri’s Massive Guitar Tone: Amps, Layers & Smart EQ
Layering & Width: EQing for a Guitar Army
In modern metal, it’s rare to have just a single rhythm guitar track. Double-tracking is standard, and quad-tracking (or even more layers) is common for creating that massive wall of sound. EQ plays a vital role in making these layers work together for maximum width and impact, rather than just creating a louder, muddier mess.
Double-Tracking (and Beyond): The Need for Differentiation
When you’re layering multiple guitar tracks, even if they’re panned hard left and right, simply having identical tones can lead to problems. Problematic frequencies can build up, the overall sound can become phasey or indistinct, and you might not achieve the width you’re hoping for.
Complementary EQ for Layered Tones
- Subtle Tonal Variations: One powerful technique is to EQ your main left and right rhythm guitars slightly differently. For example, the left guitar might have a touch more presence or bite in the 2-3kHz region, while the right guitar has a bit more body or warmth around 800Hz. These subtle differences, when panned wide, can create a richer, wider, and more interesting stereo image.
- “Tucking In” Additional Layers: If you’re using quad tracks (two main guitars panned hard, and two additional guitars panned slightly less wide), you might EQ these secondary layers more aggressively. For instance, you could high-pass them higher and low-pass them lower than the main pair, and give them a slightly different mid-range character. This allows them to add density, width, and a sense of “size” without directly competing with or muddying the primary guitar tones.
- Consider using slightly different amp sim settings, IRs (Impulse Responses), or even different guitars/pickups for your layered tracks to provide natural tonal variation before you even reach for an EQ.
Mid/Side EQ for Width and Center Focus
For more advanced control over your stereo guitar bus, Mid/Side EQ can be a powerful tool. You can:
- Subtly enhance the “Side” information (the signals that are different between the left and right channels) to increase perceived width.
- Carefully clean up or attenuate certain frequencies in the “Mid” (center) information of your guitars to create more space for elements that live in the center of the mix, like the kick drum, snare, bass (if it’s mono), and lead vocals.
Actionable Tip: If you’re quad-tracking rhythm guitars, try this: Pan your primary L/R guitars hard left and hard right. For your second pair (GTR 3 & 4), pan them somewhere like 70-80% L/R. On this second, slightly narrower pair, use your EQ to give them a distinctly different (but complementary) character. Perhaps high-pass them a bit higher (e.g., 120-150Hz), cut a little more of the deep low-mids, and give them a different kind of presence boost (e.g., more around 4-5kHz if your main pair is focused around 2-3kHz). The goal is for them to add size and texture without directly fighting the main pair.
More info:
- The Buster Odeholm Method For Recording Metal Guitars
- Spiritbox Guitar Production: Layering, Sims & Bus Magic
- Periphery’s Nolly Getgood: Building Epic Bass Tones from a DI
- Best high gain amps and cabinets for metal guitars
- Guitar Tone Hacking w/ Buster Odeholm (with NO plugins)
- Noise Gate For Metal Guitars: The Key to Ultra-Tight, Aggressive Tones
Conclusion: Your Ears, Your EQ, Your Sound
EQ is, without a doubt, one of the sharpest and most crucial tools in your shed when it comes to mixing modern metal guitars. It’s how you transform a raw, potentially chaotic, high-gain signal into a defined, powerful, articulate, and impactful cornerstone of your mix. By moving beyond simple fixes and embracing EQ as a creative sculpting force – understanding how to clear mud, enhance aggression, control fizz, and strategically shape tones both before and after distortion – you can graduate from generic, preset-reliant sounds and start carving out guitar tones that carry your unique sonic signature.
This journey of sonic sculpting, of learning to hear and manipulate frequencies with intent and precision, is exactly what Nail The Mix helps you master. When you get the chance to see top-tier metal producers break down their intricate guitar EQ strategies on real hit songs – explaining why they’re making specific cuts or boosts on those low-tuned behemoths, how they’re meticulously balancing multiple guitar layers for width and clarity, and, most importantly, how their individual EQ choices serve the overall power and aggression of the mix – you’re not just learning settings; you’re learning a mindset. This is about developing your critical ear, your problem-solving intuition, and your confidence to wield EQ as a truly creative tool to achieve your vision for absolutely face-melting metal guitars.
Ready to go beyond the presets and start making truly killer, professional-sounding guitar EQ decisions that define your sound? Check out the wealth of knowledge, real-world sessions, and supportive community at NailTheMix.com.