How to record tight and BRUTAL metal guitars w/ Buster Odeholm
Nail The Mix Staff
Let’s talk about recording rhythm guitars that absolutely slam. You know the sound – tight, aggressive, and perfectly in sync, forming a massive wall of sound. It’s a hallmark of modern metal, and getting it right at the source is crucial. We got a peek into how producer Buster Odeholm (known for his work with Humanity’s Last Breath, Vildhjarta, and more) tackles this, and he’s got some killer, practical tips you can implement in your sessions right now.
Forget overly complex setups; Buster’s method focuses on solid fundamentals and smart workflow choices. Let’s dive into his approach.
Setting Up for Success: The Pre-Roll Advantage
Ever hit record and immediately flub the first note because you weren’t quite ready? We’ve all been there. Buster emphasizes using pre-roll to nail those takes, especially when looping a section to get it just right.
A pre-roll simply means the playback starts a bit before the actual recording punch-in point, giving you a chance to get in the groove with the track.
How to Configure Pre-Roll
Most DAWs offer this feature. In DAWs like Reaper, you can often:
- Right-click the record button in your transport.
- Look for “Pre-roll” (and “Post-roll,” which does the same after the recording stops).
- Access settings (sometimes via three dots or a menu) to define the pre-roll length.
Buster suggests two good starting points:
- Time-based: Around 2 seconds of pre-roll usually does the trick.
- Bar/Beat-based: For the song in his example, 2 bars of pre-roll provided enough lead-in.
This simple step ensures you’re locked in before the red light is truly on, leading to better, more consistent takes.
The Quest for the “Perfect” Guitar Take
What defines a “good” guitar take? According to Buster, it’s when the riff you record sounds like the way you imagine it in your head. If it’s not hitting that mark, it’s probably time for another pass. But before you endlessly re-track, there’s a physical aspect to your playing that drastically affects your tone.
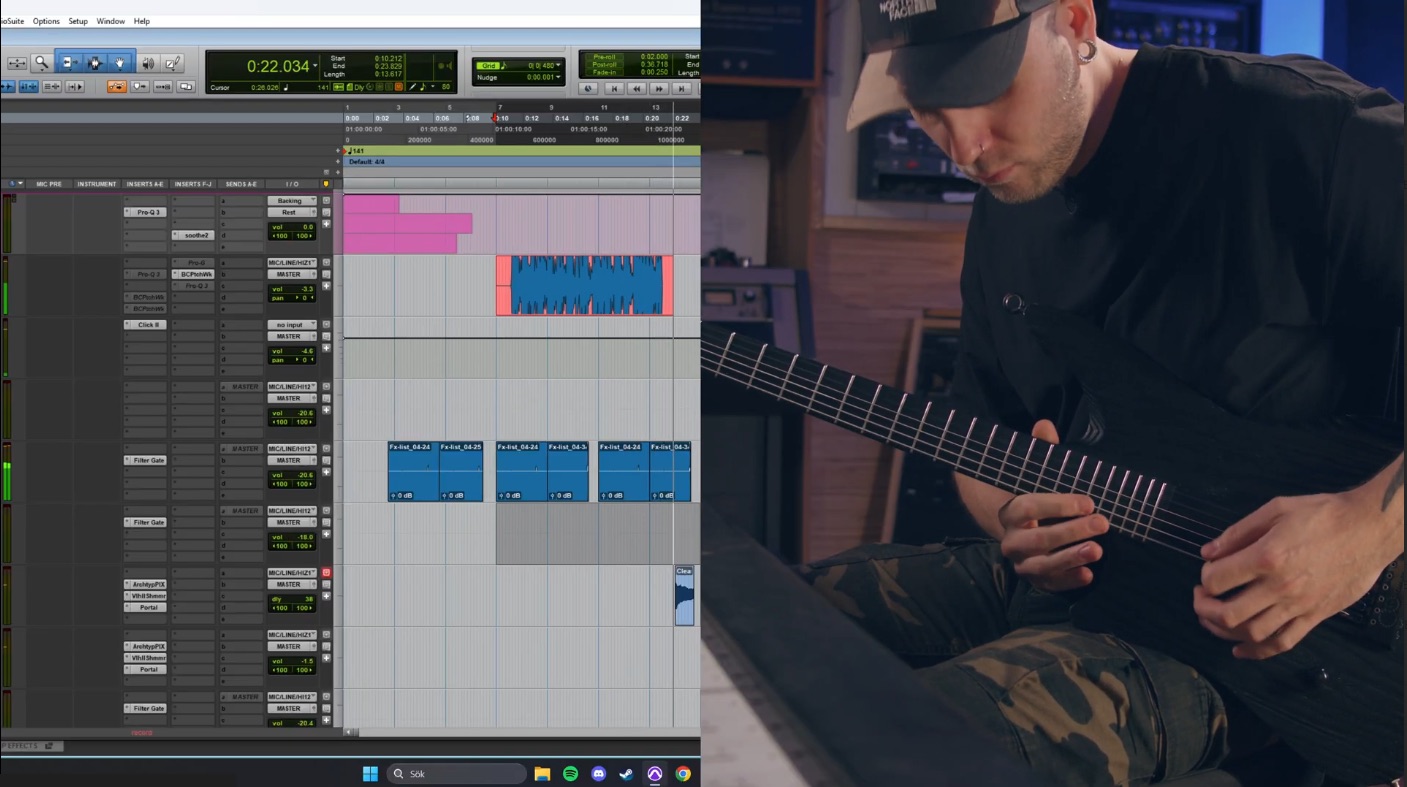
Your Hand Position: A Secret Tone Weapon
This is a big one. Where you pick the strings with your right hand (for right-handed players) massively changes the guitar’s tonal character. Buster demonstrates this clearly:
- Picking way back by the bridge: This yields a brighter, tighter, more aggressive tone with a lot of attack – classic for percussive metal riffs.
- Picking further forward, away from the bridge (towards the neck): The tone becomes rounder, warmer, and fuller, with less aggressive bite.
There’s a whole spectrum of sounds just by adjusting your picking position. Experiment with this! Moving your hand even slightly can be the difference between a tone that’s “okay” and one that’s “perfect” for the part. Think of it as a built-in EQ adjustment before you even reach for a plugin.
Mastering Your Tuning for Flawless Guitars
This should be a no-brainer, but it’s so critical it bears repeating: your guitar MUST be in tune. Out-of-tune guitars are a nightmare in a mix and instantly scream “amateur.” Buster highlights a couple of key areas here.
Beyond Open Strings: Understanding Intonation
Tuning your open strings is just the start. Intonation refers to how well your guitar stays in tune as you play up and down the neck. If your open E string is perfectly in tune, but the E at the 12th fret is sharp or flat, your intonation is off. This needs to be adjusted at the bridge of your guitar.
Buster mentions he uses an Evertune bridge, which is a fantastic piece of hardware designed to keep the guitar perfectly in tune and intonated under almost any playing conditions. If you’re serious about recording tight guitars, it’s worth looking into.
The “Tune-Per-Take” Rule (Without Evertune)
If you don’t have an Evertune bridge, make it a habit to check your tuning between practically every take. Guitars, especially under heavy playing, can drift out of tune quickly. A few seconds with a reliable tuner can save you a lot of headaches later.
Advanced Tuning: Targeting Problem Riffs
Here’s a pro tip from Buster: if you have a specific riff where certain chords or notes consistently sound a bit “off” even after a general tuning, try tuning your guitar with those specific problematic chords or notes. Use your tuner to ensure those target notes are perfect, and then track the riff. This can sometimes solve those stubborn, slightly sour-sounding passages. It’s another great example of a non-obvious hack, much like using manual DAW edits to phase-align DI and mic signals.
Creating Stereo Width and Cohesion with Double Tracking
For big metal guitars, you’re almost always going to be double-tracking (recording the same part twice, panned left and right). This creates width and power. Buster has a neat little trick when performing his second main rhythm guitar track.
The “Flip” Trick: Smarter Double Tracking
Instead of simply recording a new left take and a new right take that are completely independent from his first set of takes (let’s call them L1 and R1), he uses a “flip” technique for variation. If his first pass was L1 and R1:
- For the second layer, what was his main left performance might now be panned to the right, and a new main left performance is recorded. Or, he might use parts of previous takes and flip their panning.
Essentially, by strategically reusing and re-panning takes, (e.g., if you have two good takes, Take A and Take B, instead of just A-left/B-right, you could try A-left/B-right for one section and then B-left/A-right for another, or layer them subtly) you can create the illusion of more distinct performances and add a bit more complexity to your stereo image without necessarily recording tons of entirely new, unique parts.
Essential Guitar Editing: Cleaning Up Your Tracks
Once you’ve got your takes, a bit of cleanup is usually necessary to keep things tight and professional.
Trimming Silence and Eliminating Noise
Buster demonstrates cleaning up the start and end of his guitar regions:
- Turn off grid mode: This allows for precise, free-hand selection.
- Place the cursor: Identify the exact start of the audio you want to keep.
- Cut/Trim: He uses a shortcut, Alt+X (a common command in Reaper, often “Cut items within time selection” or similar “Trim” functions in other DAWs), to remove the unwanted silence or noise before the riff starts.
- Repeat for the end of the region to ensure clean tails or tight mutes.
Crucial tip: When performing edits like this, always make sure you have the correct audio region selected. You don’t want to accidentally chop up your MIDI tracks or something else!
The Buster Odeholm Approach: Key Takeaways
Buster Odeholm’s method for recording guitars isn’t about fancy, unobtainable gear (much like the famous dual-SM57 Fredman Technique); it’s about meticulous attention to detail and smart workflow:
- Use Pre-Roll: Give yourself the best chance to nail the take from the first note.
- Define Your “Good Take”: Ensure it matches your internal vision for the riff.
- Master Hand Position: It’s a powerful, built-in tone shaper.
- Prioritize Tuning & Intonation: Use an Evertune if possible, or tune religiously. Don’t be afraid to tune for specific problematic riffs.
- Smart Double Tracking: Use techniques like “flipping” takes to enhance stereo width.
- Clean Up Your Edits: Trim silence and noise for professional, punchy guitars.
These are actionable steps you can integrate into your guitar recording workflow today to achieve tighter, more powerful, and more professional-sounding metal tracks, similar to the methods used by producers like Jens Bogren.
Want to see how these kinds of pristine guitar tracks are then molded, EQ’d, compressed, and balanced within a full, crushing metal mix? Imagine learning these techniques and more, directly from the producers who’ve mixed some of the biggest albums in metal. At Nail The Mix, you get exactly that – access to real multi-track sessions from iconic bands, with the original producer walking you through their entire mixing process, from raw tracks to finished master. If you’re ready to Unlock Your Sound and take your mixes beyond presets, seeing how the pros do it is an invaluable experience.
Give Buster’s techniques a shot on your next recording session, and hear the difference for yourself! And if you’re serious about leveling up your metal production game, check out what Nail The Mix has to offer.

And if you want to know EVERYTHING, check out Buster’s course “How It’s Done.”