What Does Reverb Mean? Adding Depth & Space to Metal Mixes
Nail The Mix Staff
Alright, so you’re deep in a mix, guitars are chugging, drums are pounding, and vocals are tearing through. You’ve probably slapped a reverb plugin on a track or two. But let’s be real – do you truly get what reverb is doing under the hood, and more importantly, how to wrestle it into submission to make your metal tracks sound colossal instead of a chaotic, muddy mess?
Yeah, reverb isn’t just for dreamy indie rock or making your grandma’s church choir sound "heavenly." In metal, it’s a secret weapon. Used right, it carves out space, adds impact, and can give your tracks that pro-level polish. Used wrong? Well, it’s a fast track to a mix that sounds like it was recorded in a swamp. Let’s dive in.
The Nitty-Gritty: What Is Reverb, Really?
At its core, reverb (short for reverberation) is the sound of… well, sound bouncing around. Imagine screaming your favorite obscenity in a massive cathedral versus your tiny, carpeted bedroom. That lingering collection of reflections, that sense of space? That’s reverb.
It’s not just one single echo. It’s a complex series of reflections hitting your ears from all directions, decaying over time. We can break it down:
- Direct Sound: The original sound, straight from the source (your vocalist’s throat, the crack of the snare) to your ears (or the mic).
- Early Reflections: The first few distinct echoes that bounce off nearby surfaces (walls, floor, ceiling). These tell your brain a lot about the size and shape of the space.
- Late Reflections (Reverb Tail): After the early reflections, you get a dense wash of reflections that are so close together they merge into a continuous decaying sound – the reverb tail. This gives you the sense of "ambience" or the overall character of the space.
- Pre-Delay: This is a crucial one we'll talk more about. It's the gap in time between the direct sound and the start of the early reflections and reverb tail.
Modern reverb plugins, like the awesome stuff from Valhalla DSP (hello, VintageVerb!), FabFilter Pro-R, or the emulations in Slate Digital Verbsuite Classics, use complex algorithms or recorded impulse responses (IRs) to simulate these acoustic phenomena, giving you control over virtual spaces from tiny closets to massive caverns.
Types of Reverb: Your Sonic Toolkit
Different reverbs have different vibes, just like different distortion pedals. Knowing which one to grab for the job is key. Here are some of the main players you’ll encounter:
H3: Plate Reverb
Think of a big, thin metal plate suspended in a frame with transducers. Sound gets vibrated through the plate, creating a dense, bright, and often shimmery reverb. Plates don’t sound like a "real" room, but that’s their magic.
- Characteristics: Bright, diffuse, smooth, quick build-up, metallic sheen.
- Metal Uses: THE go-to for vocals to add sustain and air without sounding like they’re in a specific room. Amazing on snares for that explosive crack and size.
- Plugins & Gear: Arturia Rev PLATE-140, Soundtoys Little Plate, ValhallaPlate, UAD EMT 140 (emulating the classic hardware).
- Actionable Tip: Try a decay of 1.5-2.5s on a snare plate, with 20-40ms of pre-delay. EQ out the mud below 150Hz and tame the highs above 6-8kHz.
H3: Spring Reverb
This is the sound of old guitar amps. Actual springs are vibrated by the sound, creating a distinctive "boingy," "sproingy," metallic, and sometimes rattly sound.
- Characteristics: Twangy, metallic, characterful, can be a bit "lo-fi."
- Metal Uses: Great for vintage guitar tones, surf-rock influenced leads, or as a special effect. Can add a unique texture to clean guitars or even a heavily filtered vocal for a lo-fi vibe.
- Plugins & Gear: Softube Spring Reverb, the built-in springs in amps like Fender Twins or old Marshalls. Some plugins like AudioThing Springs give you tons of control over different spring types.
- Actionable Tip: Don’t overdo it on rhythm guitars; it can get messy fast. Try it on a guitar solo send for a bit of retro flavor.
H3: Hall Reverb
These algorithms or IRs aim to recreate the sound of large concert halls or auditoriums.
- Characteristics: Large, spacious, long decay times, can sound very smooth and enveloping.
- Metal Uses: Tricky in dense, fast metal. Too much hall reverb will turn your mix into sonic soup. Best used sparingly for epic intros, clean atmospheric sections, breakdowns, or very subtly on a drum bus for an overall sense of grandeur. Sometimes great for long vocal throws on the last word of a phrase.
- Plugins & Gear: Lexicon 480L emulations (like the Relab LX480 or UAD Lexicon 224), Valhalla VintageVerb (Concert Hall, Large Hall modes), FabFilter Pro-R.
- Actionable Tip: If you use a hall, make sure to use plenty of pre-delay (60ms+) and aggressively EQ the reverb return, especially cutting lows and low-mids.
H3: Room Reverb
Designed to simulate smaller, more natural-sounding spaces like recording studios, living rooms, or small clubs.
- Characteristics: More intimate, shorter decays, can add a sense of "realness."
- Metal Uses: Fantastic for drums to make them sound like they were recorded in a cohesive space, especially if your raw tracks are very dry. Good for vocals if you want a more upfront, natural vibe rather than an "effecty" plate. Can subtly glue guitars together.
- Plugins & Gear: FabFilter Pro-R (with its "Space" control), Waves RVerb (Room algorithm), ValhallaRoom.
- Actionable Tip: Use a short room reverb (0.5-1.2s decay) on your drum bus, blending it in just enough to give the kit a sense of environment without washing it out.
H3: Chamber Reverb
Historically, these were dedicated rooms (often in studio basements) with hard, reflective surfaces, a speaker, and microphones to capture the reverberations.
- Characteristics: Dense, rich, often with a unique, sometimes irregular frequency response due to the room’s construction. Can be less smooth than a hall but more characterful than a basic room.
- Metal Uses: A great alternative to plates for vocals and drums. Can add a lot of character and depth.
- Plugins & Gear: UAD Capitol Chambers, ValhallaRoom (Dark Chamber, Bright Chamber modes), Waves Abbey Road Chambers.
- Actionable Tip: Experiment with chamber reverbs on snares when a plate feels too bright or predictable.
H3: Algorithmic vs. Convolution Reverb
This is more about how the reverb is generated:
- Algorithmic Reverb: Uses mathematical algorithms to simulate reflections. Highly tweakable, generally more CPU-friendly. Most of the Valhalla DSP stuff, FabFilter Pro-R, and many built-in DAW reverbs are algorithmic.
- Convolution Reverb: Uses Impulse Responses (IRs) – actual recordings of how a real space (or hardware unit) responds to a full-frequency sound. Can sound incredibly realistic or capture the exact vibe of classic gear.
- Plugins & Gear: Audio Ease Altiverb (the king of convolution), Waves IR-L/IR1, Logic Pro's Space Designer, Reaper's ReaVerb. You can find IRs of everything from famous studio rooms (Ocean Way, Blackbird) to vintage plate reverbs and weird spaces.
- Actionable Tip: Try loading a "Drum Room" IR into a convolution reverb and send your close-mic'd drums to it for instant "real room" vibe.
Key Reverb Parameters & How to Wield Them in Metal
Okay, you've picked your poison (reverb type). Now, what do all those knobs actually do, and how do you dial them in for a face-melting metal mix?
H3: Pre-Delay: The Secret Weapon for Clarity
This is HUGE. Pre-delay is the amount of time between your dry, upfront sound and when the reverb starts.
- Why it’s crucial for metal: It allows the initial transient and body of your sound (especially vocals and snare) to punch through and be intelligible before the reverb washes over it. Without pre-delay, your reverb can smear the attack and make things sound distant and muddy.
- Settings:
- Vocals: 30-120ms. Longer pre-delays push the reverb further back.
- Snare: 10-60ms. Enough to let the crack through.
- Pro Tip: Use an online tap tempo BPM calculator to find millisecond values that correspond to 16th notes, 32nd notes, etc., at your song’s tempo. Rhythmic pre-delays can feel incredibly musical.
H3: Decay Time (RT60): How Long Should It Linger?
Often labeled "Decay," "Time," or "RT60," this controls how long it takes for the reverb tail to fade away (technically, to drop by 60dB).
- Metal Application: Generally, shorter is safer in busy metal mixes. Long, lush reverb tails will quickly turn your mix into an undefined mess, especially with fast double bass and tremolo-picked guitars.
- Snare Plates/Rooms: 0.8s – 1.8s is a common range.
- Vocal Plates/Halls: 1.5s – 3s (but remember, these are often heavily EQ'd and sometimes automated).
- Overall Guideline: The faster and denser the music, the shorter your reverb decays should generally be. If you can clearly hear the reverb tail over the next prominent hit or phrase, it might be too long.
- Pro Tip: Tempo-syncing decay times (if your plugin allows it) can also help reverbs groove with the track.
H3: Early Reflections vs. Late Reflections (Tail): Sculpting the Space
Some reverbs (like FabFilter Pro-R) give you separate control over the level and character of early reflections (ER) and the late reverb tail.
- Metal Application:
- ERs for width/presence: Boosting early reflections can give a sense of space and width without a long, muddy tail. Great for making elements feel "in a space" without being obviously "reverbed."
- Tail for ambience/effect: The late tail is what we typically think of as the "reverb sound." Controlling its level, density, and length is key.
H3: Size/Width: Big or Tight?
This parameter often controls the perceived size of the simulated space and the stereo width of the reverb.
- Metal Application:
- Wide Reverbs: Can sound impressive on soloed elements but can quickly wash out a mix if overused. Good for atmospheric pads, lead vocal "throws," or big FX moments.
- Tighter/Mono-ish Reverbs: Sometimes, a mono reverb panned slightly off-center, or a stereo reverb with its width narrowed, can sit better in a dense mix, adding depth without cluttering the stereo field.
- Actionable Tip: Don’t be afraid to use a mono reverb plugin on a snare or vocal, especially if your mix is already very wide. You can then pan that mono reverb return wherever you want it.
H3: Damping/HF Cut/LF Cut: Taming the Beast
This is arguably one of THE MOST IMPORTANT aspects of using reverb in any genre, but especially in metal. Damping controls how quickly high frequencies (HF Damping) or low frequencies (LF Damping) decay in the reverb tail relative to the mid-range. Many reverbs also have dedicated high-pass (HPF/LF Cut) and low-pass (LPF/HF Cut) filters on the reverb signal itself.
- Why it’s ESSENTIAL for metal:
- HF Damping/LPF: Prevents reverb from sounding overly bright, "sizzly," or emphasizing sibilance (those nasty "sss" and "tsh" sounds) in vocals. Metal guitars are already bright; you don’t need bright, washy reverb on top.
- LF Damping/HPF: CRUCIAL for preventing reverb from adding mud and rumble to your low end, which is already packed with bass guitar and kick drum. Reverb on low frequencies is a recipe for disaster.
- This is where your EQ skills come in. You should be aggressively EQing your reverb sends and/or returns. For more on surgical EQ moves, check out our EQ Strategies for Mixing Modern Metal hub page.
- Settings:
- LPF/HF Cut on Reverb Return: Often between 4kHz – 8kHz.
- HPF/LF Cut on Reverb Return: Often between 100Hz – 500Hz (yes, that high sometimes!).
- Experiment with damping settings – more HF damping makes the reverb sound darker and sit further back.
H3: Diffusion: Smooth or Grainy?
Diffusion controls the density of the reflections in the reverb tail.
- High Diffusion: Creates a smoother, denser, more homogenous tail. Usually good for vocals and general ambience.
- Low Diffusion: Can make individual echoes more distinct, leading to a grainier, sometimes "fluttery" or "slap-like" sound. Can be cool for percussive effects or if you want a more vintage, less polished reverb sound.
- Actionable Tip: For most metal applications where you want the reverb to blend, higher diffusion is often your friend.
Practical Reverb Techniques for Crushing Metal Mixes
Theory is cool, but how do you actually use this stuff?
H3: The Classic Snare Plate: Making Your Snare Explode
This is a metal mixing staple.
- Setup: Create an FX send from your main snare track (or snare top mic) to an aux track with a plate reverb plugin.
- Plugins: ValhallaPlate, Soundtoys Little Plate, Arturia Rev PLATE-140.
- Settings:
- Pre-delay: 20-50ms (let the initial crack through).
- Decay: 1.2s – 2.0s.
- EQ: HPF @ 150-250Hz, LPF @ 5-7kHz. You might even dip some mids around 500-800Hz on the reverb return if it’s clashing with the snare’s body.
- Optional: Gate the reverb return, keyed off the original snare, for a tighter, more controlled explosion of sound that cuts off cleanly.
Vocal Reverbs: From Subtle Ambience to Epic Washes
Vocals often get a combination of effects.
- Layering:
- Short Reverb (Room/Short Plate): For presence and a sense of space. Very subtle. Decay around 0.5-1s.
- Long Reverb (Plate/Hall/Chamber): For the "effect" reverb. Longer decay (1.5-3s+), more noticeable.
- Delays into Reverbs: Send your vocal to a delay (e.g., a stereo slap or a 1/8th note delay like Soundtoys EchoBoy or ValhallaDelay), then send the output of that delay to your main vocal reverb. This creates a more complex, diffuse sense of space.
- EQ is King: EQ the send to the reverb (cutting lows and highs before they even hit the plugin) AND EQ the reverb return (further shaping the reverberated signal).
- Sidechaining Reverb: This is a killer trick. Put a compressor on your main vocal reverb return. Set up a sidechain input on that compressor, fed from your dry lead vocal track. Now, when the vocalist is singing, the dry vocal triggers the compressor to duck the reverb level. When they stop singing (between phrases), the reverb swells up. This keeps the vocal clear and upfront but still allows for a big reverb sound in the gaps. For more on how compressors and sidechaining work, dive into our Metal Compression Secrets hub page.
H3: Guitar Reverb: Tread Carefully!
Generally, less is more with distorted rhythm guitars.
- Why it’s risky: Heavy distortion already creates a lot of harmonics and sustain. Adding too much reverb on top will turn your tight, chugging riffs into a undefined wall of noise.
- When to use it:
- Clean intros/interludes: A nice room, hall, or spring can sound beautiful.
- Guitar Solos: A plate or hall can give solos sustain and make them soar. Pre-delay is your friend here too.
- Specific FX: A huge, washed-out reverb for an ambient section.
- Types: Short rooms, subtle springs (like from a Softube Amp Room spring emulation), or a carefully EQ'd plate for leads.
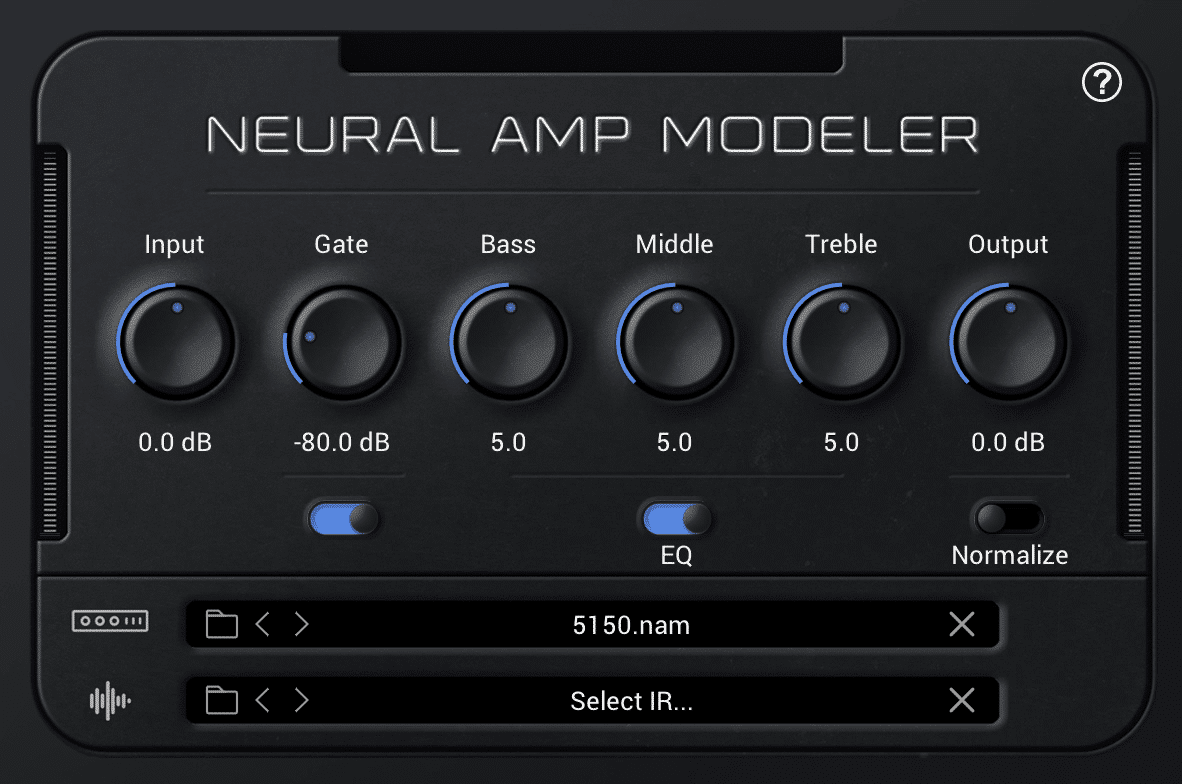
- Creative Spark: Try putting a reverb on a DI guitar signal before it hits your amp sim (Neural DSP Archetype series, Positive Grid BIAS FX, etc.). This creates a unique "reverb-into-distortion" texture that can be really cool for atmospheric parts.
Drum Room Reverb: Creating Cohesion
If your drums were recorded in a dry space or you’re using samples, a shared room reverb can make them sound like a cohesive kit played in a real environment.
- Setup: Send your kick (sparingly, if at all), snare, and toms to an aux track with a room reverb.
- Plugins: Convolution reverbs with good drum room IRs (Altiverb, Waves IR-L with IRs from studios like Ocean Way or Henson Studios) are great. Algorithmic rooms like ValhallaRoom or FabFilter Pro-R also work well.
- Blending: Blend this room reverb subtly underneath your overheads and dedicated room mics (if you have them). The goal is natural cohesion, not an obvious "reverb" sound.
H3: The "Reverb Throw" / "Reverb Splash" Technique
This is about using reverb as a dramatic punctuation mark.
- How it works: Automate the send level to a long, noticeable reverb (often a hall or large plate with a 2-4s+ decay) to dramatically increase on specific words, snare hits, cymbal crashes, or guitar chords for emphasis. The send then quickly ducks back down.
- Example: On the last word of a powerful vocal line, crank the send to a huge hall reverb, let it ring out, then pull it back before the next phrase starts.
H3: Non-Linear Reverb: That 80s Gated Snare Sound (and more)
Non-linear reverb doesn’t decay naturally. It might swell up and then cut off abruptly (classic gated reverb) or have other weird envelope shapes.
- How to get it: Some plugins like Valhalla VintageVerb (Nonlin mode) or Slate Digital Lustrous Plates have dedicated non-linear algorithms. You can also create it by sending a snare to a regular reverb and then putting a gate on the reverb return, sidechained to the original snare, with a fast attack and a carefully set hold and release on the gate.
- Metal Uses: The classic 80s gated snare is an obvious one. Can be cool for a retro vibe or on toms. Modern uses can be more subtle, adding a burst of texture without a long tail.
Common Reverb Mistakes in Metal (And How to Fix 'Em)
We’ve all been there. Here are some pitfalls to avoid:
- Too Much Reverb Overall: The #1 culprit for muddy, amateur-sounding mixes. If in doubt, turn it down. Then turn it down some more.
- Reverb Tails Too Long for the Tempo: Kills definition, especially in fast passages. Listen to how the tail interacts with subsequent notes/hits.
- NOT EQing Reverbs: This is a cardinal sin. Un-EQ'd reverb, especially in the low and high frequencies, is a recipe for mud and harshness. EQ your sends, EQ your returns. Always.
- Reverb Smearing Transients (Lack of Pre-Delay): Makes vocals, snares, and other percussive elements lose their punch and sound distant. Use pre-delay!
- Stereo Reverbs on Everything: Can make the mix feel wide but also undefined and washy. Try mono reverbs or narrowing the width of stereo reverbs to maintain focus. Not every reverb needs to be super-wide.
- Forgetting Reverb is an Effect: Sometimes, the best reverb is the one you barely notice consciously but that adds the perfect subtle depth or character. Other times, you want it to be an obvious, bold statement. Know your intent.
Elevate Your Reverb Game with Nail The Mix
Understanding reverb parameters and common techniques is a solid foundation. But seeing how world-class producers like Joey Sturgis, Joel Wanasek, Eyal Levi, and their guests actually deploy these tools on real-world, chart-topping metal tracks? That’s where the real learning skyrockets.
Imagine watching a producer dial in the perfect snare plate for a Periphery track, or craft a vocal reverb chain for a Gojira song, explaining every decision, every plugin choice (FabFilter Saturn on the send for saturation? Waves CLA Vocals after the reverb for shaping? Who knew!), and every nuanced setting. That’s what Nail The Mix offers. You get the raw multitracks and watch the original producers (or guest mega-producers) mix them from scratch, live. You see them wrestle with reverb, EQ it, automate it, and make it serve the song.
If you’re ready to go beyond basic reverb settings and truly master how to use space and depth to elevate your metal productions, it’s time to see how the pros do it.
Learn how to Unlock Your Sound: Mixing Modern Metal Beyond Presets with Nail The Mix, get access to those invaluable multitracks, exclusive plugins, and a community of like-minded producers.
Reverb is more than just "making things sound far away." It’s a fundamental tool for shaping tone, creating atmosphere, and adding professional polish to your metal mixes. So, grab your favorite reverb plugin – whether it’s a workhorse like ValhallaRoom or a character piece like Soundtoys Little AlterBoy feeding into a Blackhole by Eventide – experiment with these concepts, and start carving out some killer sonic spaces in your tracks. Now go make some noise!