Tighten Muddy Metal Kick Drums With Slate Trigger 2 Envelope
Nail The Mix Staff
When you’re mixing metal, especially tracks with rapid-fire double kick patterns, low-end clarity is everything. We’ve all been there: the drummer is playing 16th notes at 220 BPM, and while the performance is tight, the kick samples themselves are just… too long.
The tails overlap, the sub-frequencies build up, and suddenly your aggressive kick drum sounds like a muddy, indistinct rumble.

Most producers instinctively reach for a Eq automation or a transient shaper to fix this. But there is a cleaner, more transparent way to handle this before the audio ever hits your first plugin. If you are using Slate Trigger 2, you have a powerful envelope shaper built right into the sampler that can tighten up your low end instantly.
Here is how to use the Envelope Shaper in Slate Trigger 2 to clean up your kick drums at the source.
Why Fix It In The Sampler?
Before we tweak knobs, it’s important to understand why we are doing this inside the plugin rather than on the console.
When you use a noise gates can often be inaccurate. If the sample has a long, booming tail, the gate has to clamp down hard to silence it between hits. This often leads to “chatter” or unnatural cutoffs that sound robotic.
By adjusting the envelope inside Trigger 2, you are actually changing the length of the sample being triggered. You aren’t gating a long sound; you are turning it into a short sound.
- Cleaner Signal Flow: You eliminate low-end mud before it hits your compressors or EQ.
- Natural Decay: The envelope fade-out in Trigger tends to sound more musical than a hard gate release.
- Phase Coherence: High passes can often change the phase of the sound source and change the way it interacts with the other mics in the kit
Step-by-Step: The Slate Trigger 2 Envelope Hack
This technique is hidden in plain sight within the Trigger interface. Here is how to dial it in:
1. Load Your Samples
Get your kick drum blend sounding right. Whether you are using the stock Slate samples or your own custom WAVs, this trick works on everything.
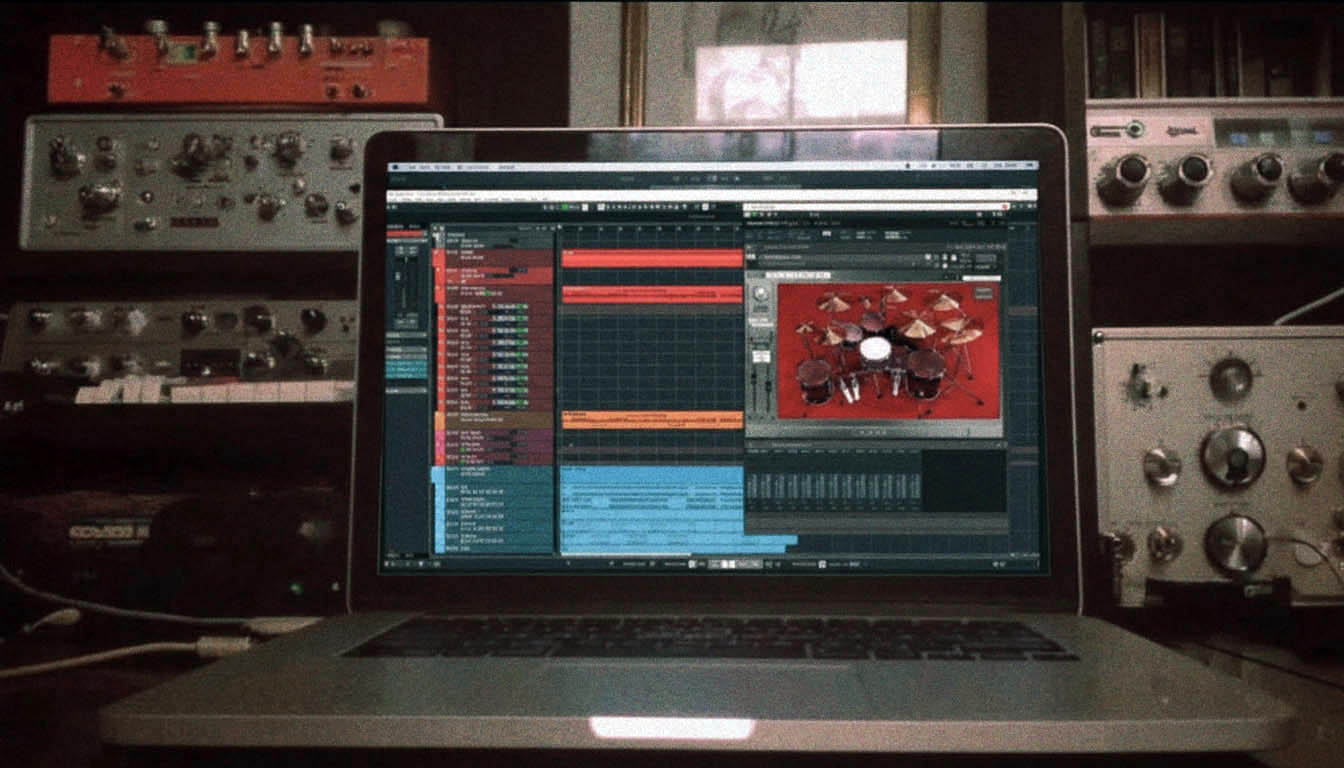
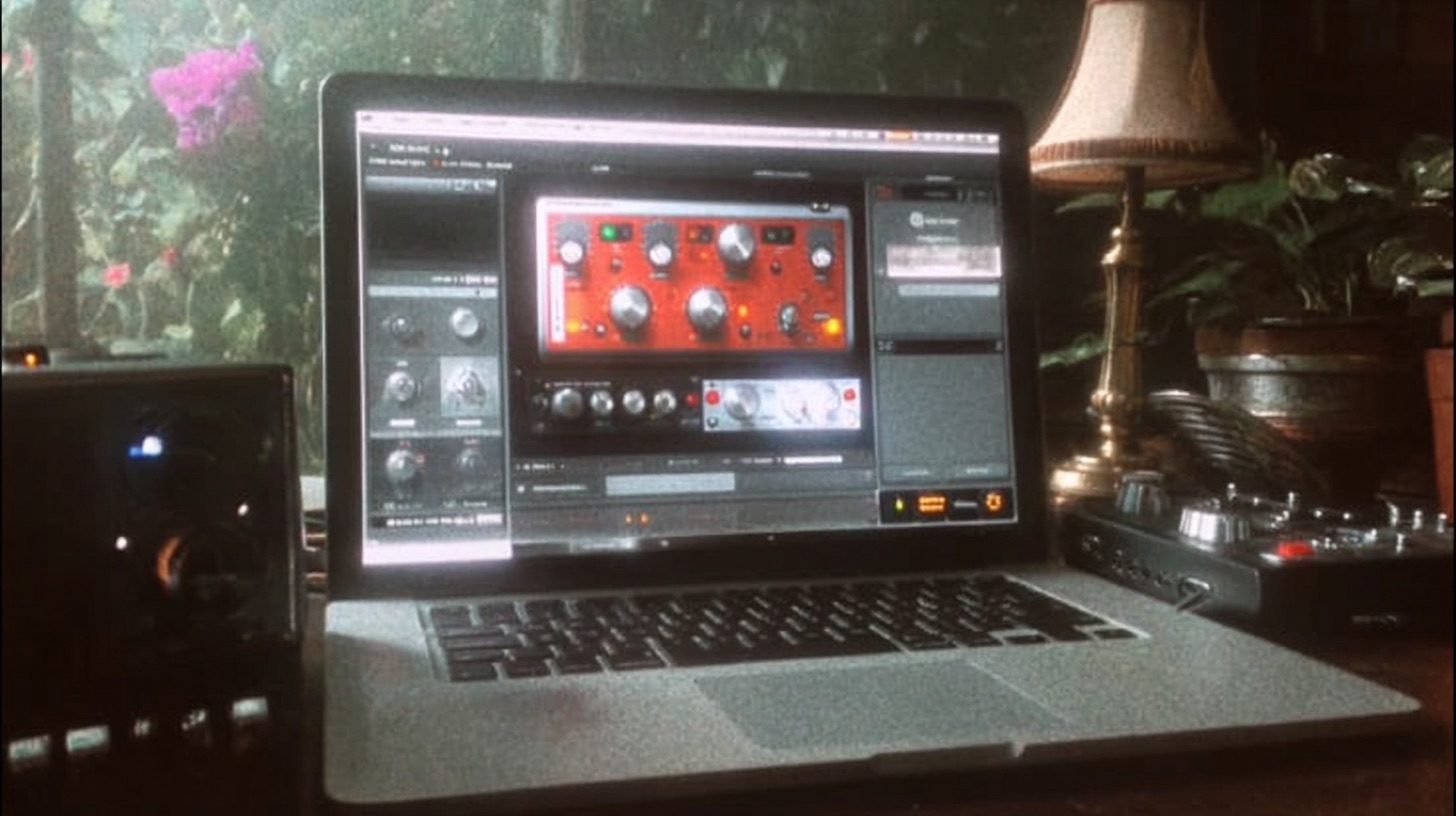
2. Open “View Curves”
On the left side of the Trigger 2 interface, look for the button labeled View Curves. By default, Trigger shows the mixer view. Clicking this swaps the faders for the ADSR (Attack, Decay, Sustain, Release) envelope controls for each of your loaded samples.
3. Adjust The Sustain (S) and Release (R)
This is where the magic happens. You will see controls for A (Attack), S (Sustain), and R (Release).
- Sustain (S): Lowering this determines how long the sample plays at full volume.
- Release (R): This controls how quickly the sample fades out after the sustain phase ends.
To tighten a kick for fast metal, you want to aggressively shorten both the Sustain and Release.
Start by pulling the Release down significantly—often below .50s or even shorter depending on the BPM. You will instantly hear the “boom” of the kick tighten up into a punchy “thud.”
4. Listen In Context
Do not do this in solo. It is tempting to make the kick sound “perfect” on its own, but you need to hear how it interacts with the bass guitar and the guitars.
Play the track during the fastest double-kick section. Shorten the Release until the distinct attack of each kick hit pokes through, and the low-end rumble disappears. If it sounds too dry or “clicky,” back the release off slightly to let a little more tone through.
The Result? Custom drum samples!
By using the internal envelope, you effectively create a custom drum sample tailored exactly to the tempo of your track. Your kick drum will hit hard, the low end will remain tight, and you won’t have to over-process your kick bus to fix mud that shouldn’t have been there in the first place.
Ready to take your metal mixes to the next level? Join Nail The Mix today and get access to raw multi-tracks and live mixing sessions from the world’s best heavy music producers.