The Best Reverb Plugins for Modern Metal Mixers
Nail The Mix Staff
When you think of a crushing metal mix, reverb isn’t the first thing that comes to mind. You’re probably thinking about a tight, punchy kick drum, a chainsaw guitar tone, and a snare that cracks like a rifle shot.
But reverb is the secret weapon that turns a collection of dry, sterile tracks into a cohesive, three-dimensional monster. It’s what gives your snare its epic tail, your vocals their haunting atmosphere, and your entire mix a sense of space and depth.
The big question everyone asks is: which reverb plugin is the best? The answer, like most things in mixing, is… it depends. But more importantly, the plugin itself is only a fraction of the equation.
The Big Question: Does Your Reverb Plugin Really Matter?
Look, we’ve all been there. You see a pro like Jens Bogren, Will Putney, or another Nail The Mix instructor using some esoteric plugin and you think, “That’s it! That’s the secret sauce!” You drop a couple hundred bucks, load it up, and… your mix still sounds the same.
This is Plugin Acquisition Syndrome, and it’s a real creativity killer. The truth is, you don’t need twenty different reverbs. You need to master one or two and understand why you’re using them. Could Jens get a killer mix with just your DAW’s stock reverb? Absolutely. Because he has the skills. He knows what he’s listening for and how to get it.
Your skills, your ears, and your decisions are what make a mix great. The tool just helps you get there. So, this isn’t just a list of plugins to buy. It’s a guide to understanding what makes a reverb work for heavy music so you can make killer choices with whatever tools you have.
What to Look for in a Reverb for Metal
Before we name names, let’s talk about the controls and concepts that actually make a difference in a dense, aggressive mix.
Algorithmic vs. Convolution
You’ll see these two terms thrown around a lot. Here’s the simple breakdown:
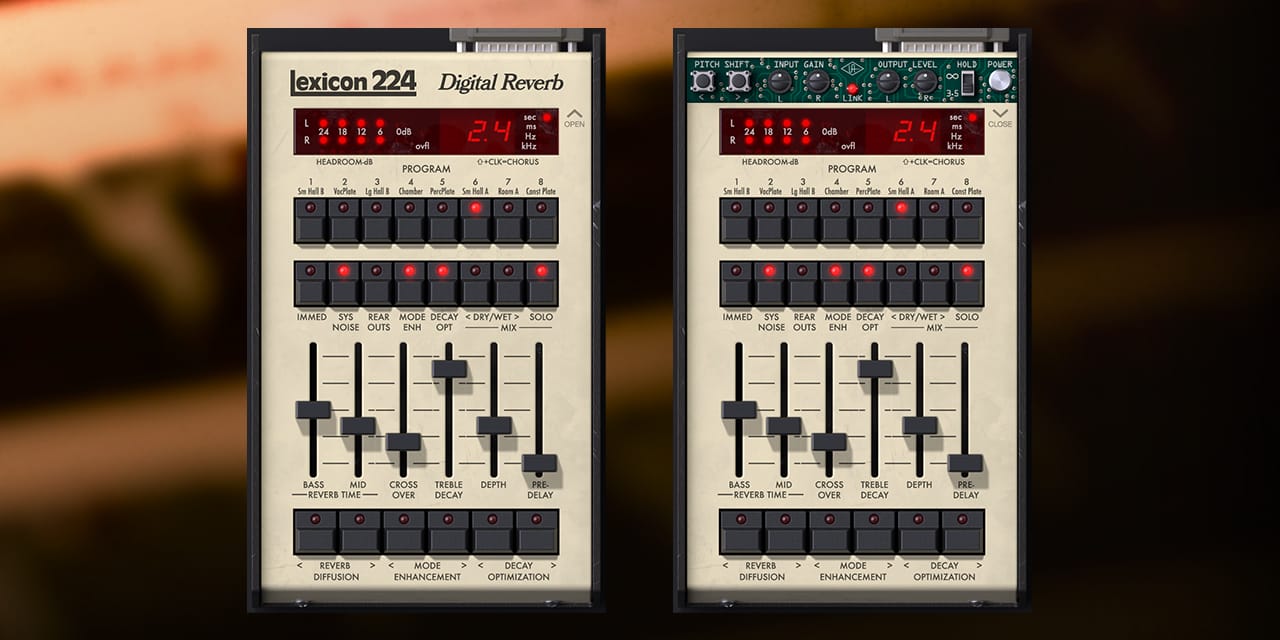
- Algorithmic Reverbs: These use complex math to simulate a space. They are super flexible and great for creating lush, modulated, and even unnatural-sounding spaces. Think of them as the synths of the reverb world. Most classic hardware units (like the Lexicon 224 or 480L) were algorithmic.
- Convolution Reverbs: These use an audio recording of a real space (called an Impulse Response or IR) to recreate its acoustic characteristics. They are fantastic for realism. Want your drums to sound like they were recorded in a specific stone chapel or a tight wooden live room? A convolution reverb is your best bet.
For metal, you’ll use both. An algorithmic plate for a snare tail, and a convolution room for the drum bus, for example.
Key Parameters That Make a Difference
Don’t get lost in a sea of knobs. Focus on these three.
1. Pre-Delay
This is arguably the most important reverb parameter for metal. Pre-delay is the amount of time before the reverb tail starts. By setting a pre-delay of, say, 20-60ms on your snare reverb, the initial transient of the snare hits the listener’s ear clean and punchy, and then the washy reverb tail blooms behind it. Without pre-delay, the reverb can smear the transient and make your drums sound weak and distant.
2. EQ / Damping
A raw reverb tail is full of frequencies that will clash with your mix. Low-end rumble will fight your kick and bass, and high-end sizzle will compete with your cymbals and hi-gain guitars. You need to shape your reverb. Almost all good reverb plugins have built-in EQs or damping controls.
Actionable Tip: On your reverb send, always use an EQ to aggressively high-pass around 200-500Hz and low-pass around 5-8kHz. This carves out a perfect spot in the midrange for the reverb to live without turning your mix into a muddy, fizzy mess.
3. Decay Time
This one’s obvious—it’s how long the reverb tail lasts. The trick is to time it to the tempo of your song so it doesn’t wash over into the next phrase. A long, epic decay on a snare might sound cool in isolation, but in a fast double-kick section, it’s just going to create a wall of noise.
Our Go-To Reverb Plugins and Why We Use Them
Okay, with the philosophy out of the way, here are some plugins that consistently deliver the goods for heavy music, and more importantly, why they work so well.
For Epic, Lush Spaces: ValhallaDSP VintageVerb
There’s a reason you see this plugin in almost every metal producer’s session. It’s cheap, it’s CPU-efficient, and it sounds absolutely phenomenal. It models a bunch of classic digital reverb units from the 70s and 80s.
- Why we love it: The interface is simple, forcing you to use your ears. The different modes like “Concert Hall,” “Bright Hall,” and “Plate” give you a ton of character instantly.
- How to use it for metal: Slap it on a bus send for your lead vocals or snare. Try the “Plate” mode, set the pre-delay to 30ms, and use the built-in Damping/EQ section to roll off the highs and lows. You’ll get that classic, epic vocal verb or a snare tail that goes on for days without cluttering the mix.
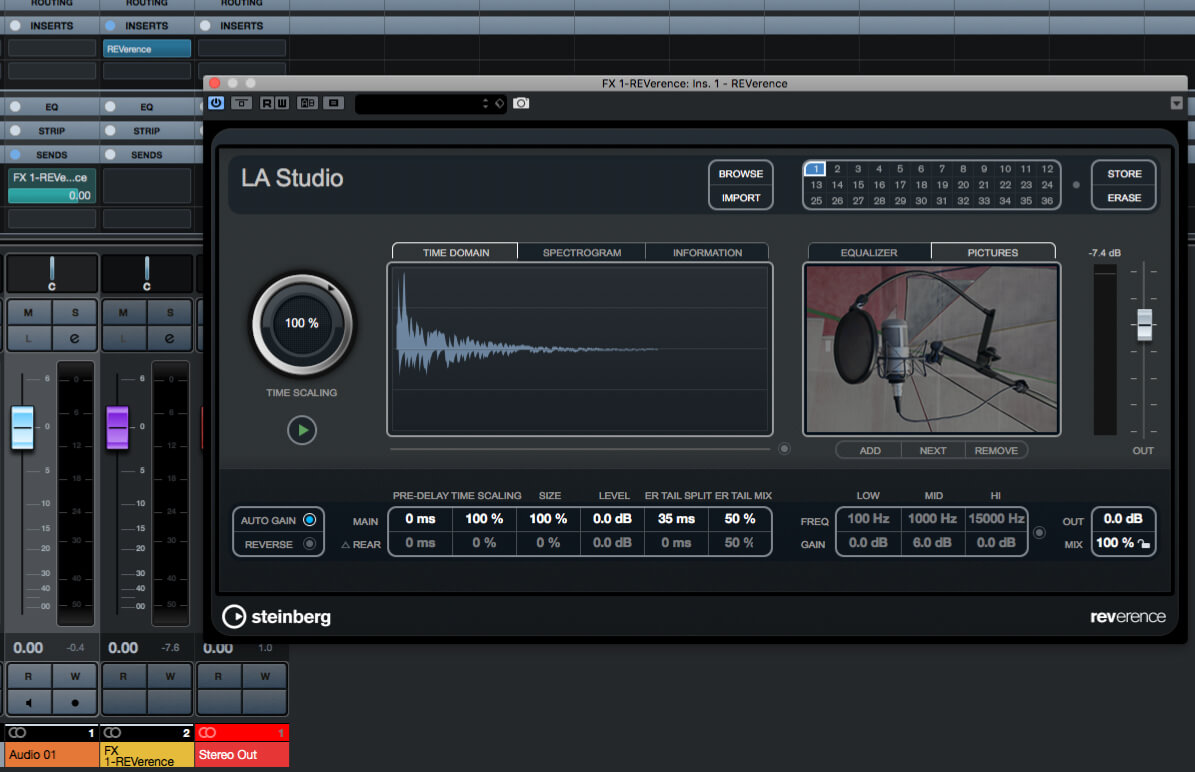
The Underrated Workhorse: Your Stock Reverb
Seriously. Stop sleeping on your stock plugins. Logic’s ChromaVerb, Cubase’s REVerence, and Reaper’s ReaVerbate are incredibly powerful. They have pre-delay, they have EQs, they have everything you need.
- Why we love it: It’s free! And it forces you to focus on the fundamentals—pre-delay, EQ, decay time—rather than getting lost in fancy GUI graphics. Master your stock reverb and you’ll be able to get a great sound out of any tool.
- How to use it for metal: The same way you’d use any other reverb. Use it on an aux send. Dial in your pre-delay to maintain punch. Follow it with a stock EQ to aggressively clean up the low and high end. You’ll be shocked at how pro it can sound.
For Realistic Rooms & Drums: LiquidSonics Seventh Heaven / Cinematic Rooms
When you need to put your drum kit in a believable space, convolution is the way to go. LiquidSonics are the undisputed kings of this, with their plugins famously emulating the high-end Bricasti M7 hardware reverb.
- Why we love it: The realism is insane. It’s perfect for creating a “drum room” bus. By sending your whole kit (or just the shells) to a short, realistic room reverb, you can make a sample-based kit sound like it was recorded in a world-class live room, gluing all the pieces together.
- How to use it for metal: Create a bus with Seventh Heaven on it. Choose a “Small Room” or “Studio” preset. Keep the decay short (under 1.5s) and blend it in just enough to give the kit a sense of space without making it sound distant.
Knocked Loose on Nail The Mix
Will Putney mixes "Mistakes Like Fractures" Get the SessionThe bottom line is that any modern reverb plugin can get the job done. The real secret is knowing how to use it. Focus on pre-delay to keep your mix punchy, and use aggressive EQ to make sure your reverb isn’t fighting the other instruments. Master those two concepts, and you’ll create massive, professional-sounding metal mixes with any tool.