
How To Capture Your Own Amps with NAM (Neural Amp Modeler)
Nail The Mix Staff
One of the most powerful features of Neural Amp Modeler (NAM) isn’t just downloading free tones- it’s the ability to “archive” your own gear.
As a producer, you’ve spent years (and a small fortune) collecting and modifying your amps. You have a specific ’90s Mesa Rectifier with a new transformer, or a modded 5150 that just has that sound. NAM gives you a way to “bottle the exact sound” of that hardware and recall it instantly in any session, on any project, forever.
Unlike hardware profilers, Neural Amp Modeler has a massive workflow advantage: it separates the capturing process from the training process. This means you can spend your valuable studio time doing what matters—re-amping and capturing your entire amp collection—and then run the computer-intensive “training” part later, for free, when you’re off the clock.
Here is the definitive producer’s guide to creating a high-quality, professional Neural Amp Modeler capture of your own gear.
“Amp-Only” Capture is the Professional Standard
Before you plug anything in, you must decide what you’re capturing. While you can capture a “full rig” (amp + cabinet + mic), this is highly inflexible.
The professional method is to capture the amp-only tone.
By capturing just the amplifier head, you get a “DI” model of the amp. This allows you to pair it with your existing, world-class library of Impulse Responses (IRs) later in the mix. This is the method that yields the most flexible and consistent results. To do this, you will need to tap the signal before the speaker, using a high-quality load box with a line-level output.
The Gear You’ll Need
- Your Amp Head (or Pedal): The hardware you want to archive.
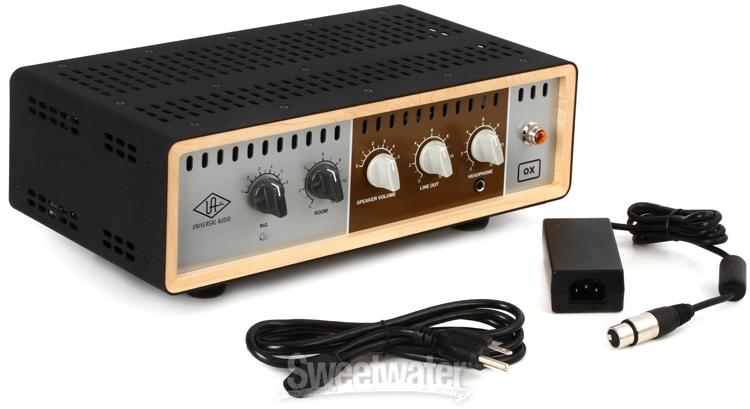
- A Load Box: This is essential for capturing a real tube amp. You need one with a line-level or DI output (e.g., a Suhr Reactive Load, UA Ox, etc.).
- A Re-amp Box: To send your DI signal from your interface to your amp at the correct impedance and level.
- Your DAW & Interface: For playing back the training file and recording the result.
Part 1: The Capture Process (The “Studio” Phase)
This is the most critical part. Your final model will only be as good as your capture.
1. Download the “Magic” Training File You don’t just record yourself playing. NAM uses a specific, scientific audio file to “teach” the algorithm what your amp sounds like. This file sounds like a series of sweeps and noises, designed to excite the amp across its full frequency and dynamic range.
You can find the latest training file (often named something like V1.1.1.wav) on the official Neural Amp Modeler GitHub page.
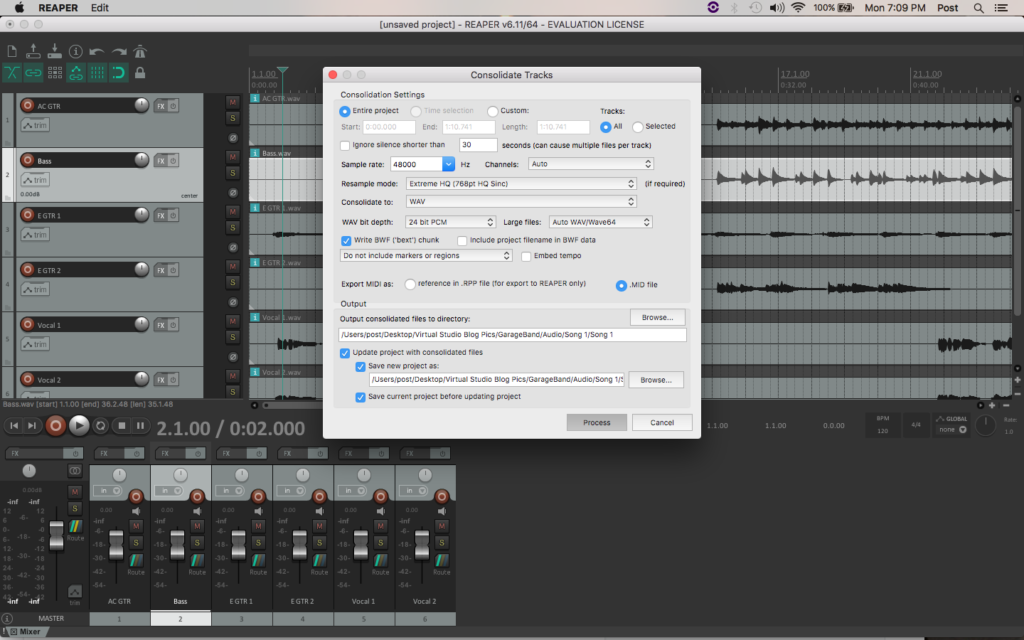
2. Set Up Your Signal Chain
- Create a new, mono audio track in your DAW. Import the V1.1.1.wav training file onto this track.
- Route this track’s output to your re-amp box.
- Connect the re-amp box to the input of your amp head.
- Dial in your perfect metal tone on the amp.
- Connect the amp’s speaker output to the input of your load box.
- Connect the line output of your load box to a mono line-level input on your audio interface.
- Create a new mono audio track in your DAW and arm it to record this input.
3. Pro-Tip: Clean Your Signal Path This is critical. Neural Amp Modeler is not designed to capture time-based or modulation effects. If you have a chorus, delay, or reverb pedal active, or a compressor in the amp’s effects loop, turn it off. These effects will confuse the training algorithm and ruin your capture. You should also disable any built-in noise gates.
4. Record and Export Your “Output” File Hit record in your DAW and play the V1.1.1.wav training file from start to finish. You will be recording the sound of your amp processing that signal.
When you export this new recording, your settings must be exact:
- File Format: WAV
- Sample Rate: 48kHz
- Bit Depth: 24-bit
- Channels: Mono
- Length: Your export must be exactly the same length, down to the sample, as the original training file. Be sure to disable any “auto-fade” or “dither” in your export settings.
- Volume: Make sure your recording is not clipping! A clean signal with plenty of headroom is ideal.
You now have your two essential files: the original V1.1.1.wav (your “input”) and your newly recorded your_amp.wav (your “output”).
Part 2: The Training Process (The “Computer” Phase)
This is the “easy” part. You don’t need a supercomputer; you can use Google’s for free.
1. Use the Google Colab Notebook The easiest way to train a model is with the free Google Colab notebook provided by the Neural Amp Modeler developers. This is a simple, web-based tool that runs the complex machine-learning process on Google’s powerful GPUs. You can find the link to the Colab on the NAM GitHub page.
2. Upload and Rename Your Files Open the Colab notebook and follow its simple steps.
- Run the “Install NAM” cell: This just involves clicking a “play” button to set up the software.
- Upload your two WAV files:
- The original training file (e.g., V1.1.1.wav). It must keep its original name.
- Your new recording (e.g., your_amp.wav). This file must be renamed to output.wav for the script to find it.
3. Configure Your Training Before you hit “train,” you have a few options:
- Epochs: This is the number of times the algorithm “studies” your files. 100 is a great starting point. For complex, high-gain metal tones, you may get more accurate results by running 400-600 epochs, but you’ll see diminishing returns after that.
- Architecture: This is the trade-off between accuracy and final CPU usage.
- Standard: The most accurate and most CPU-intensive. For archiving your best studio tones, this is what you want.
- Lite / Feather: Less accurate, but much lighter on the CPU. “Feather” is ideal for simple captures like a boost pedal.
- Metadata: Fill this out! You can add your studio name, the amp, the settings, etc.
4. Train and Check Your “Score” (ESR) Run the training cell. This may take 15-20 minutes or more, depending on your Epochs setting.
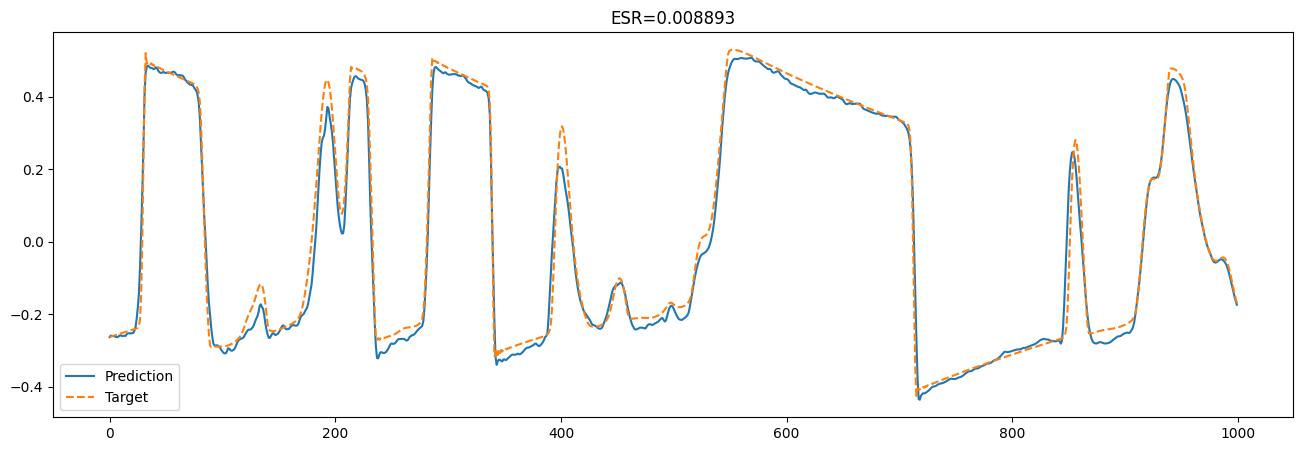
When it’s finished, it will give you a final ESR (Error to Signal Ratio). This is your quality score.
- Closer to 0 is better. An ESR of 0.04 is good, and anything lower is excellent.
- A high ESR (e.g., > 0.1) means something went wrong. You likely clipped the recording, had an unwanted effect on, or exported your file with the wrong settings.
5. Download Your .nam File The Colab notebook will show you your final .nam model file. Download it, and you’re done.
Part 3: Using Your Custom-Made Capture
Now for the payoff.
- Load the Neural Amp Modeler plugin on a DI guitar track in your DAW.
- Click the model selection area and load your newly created .nam file.
- Crucially: Because you captured “amp-only,” you must now load an Impulse Response. Use NAM’s built-in IR loader or, even better, a separate IR plugin with your favorite cab IRs.
You are now playing a perfect digital archive of your unique, physical amplifier.
Vitriol on Nail The Mix
Dave Otero mixes "Shame and its Afterbirth" Get the SessionMore on Neural Amp Modeler: