

How To Tune Clean Vocals Without The Robot Effect
Nail The Mix Staff
You want that polished, radio-ready tightness, but the second you crank the retune speed on your automatic pitch correction plugin, you enter “T-Pain” territory. While that hard-tuned effect has its place in pop and trap, it usually sounds cheap and distracting on a metal track. You lose the emotion, the grit, and the human element.
The secret to getting transparent, perfectly tuned vocals that still sound human lies in manual pitch correction – specifically, how you handle the transitions between notes.
Here is the one Melodyne workflow hack that will change how you tune forever.
The Problem: Why Automatic Tuning Sounds Robotic
To understand the fix, you have to understand why automatic plugins (like the basic view of Antares Auto-Tune or Waves Real-Time) make singers sound robotic.
It usually comes down to Retune Speed (or Response Time). When a singer moves from one note to another—say, from a C to a D—they don’t teleport instantly. The vocal cords slide, creating a micro-pitch ramp between the two frequencies.
If your retune speed is set to “Fast” or “0ms,” the plugin looks at that slide, panics, and snaps the audio instantly to the nearest semitone. It eliminates the natural glide. That unnatural, instantaneous jump is what our ears perceive as the “Cher effect.”
The Fix: Separate the Sustain from the Transition
The solution is to stop treating the entire vocal performance as one blob of data. You need to treat the sustained notes (where the pitch should be stable) differently than the transitions (where the pitch should glide).
This technique requires a manual graphical editor like Celemony Melodyne, Antares Auto-Tune in Graph Mode, or Steinberg VariAudio.
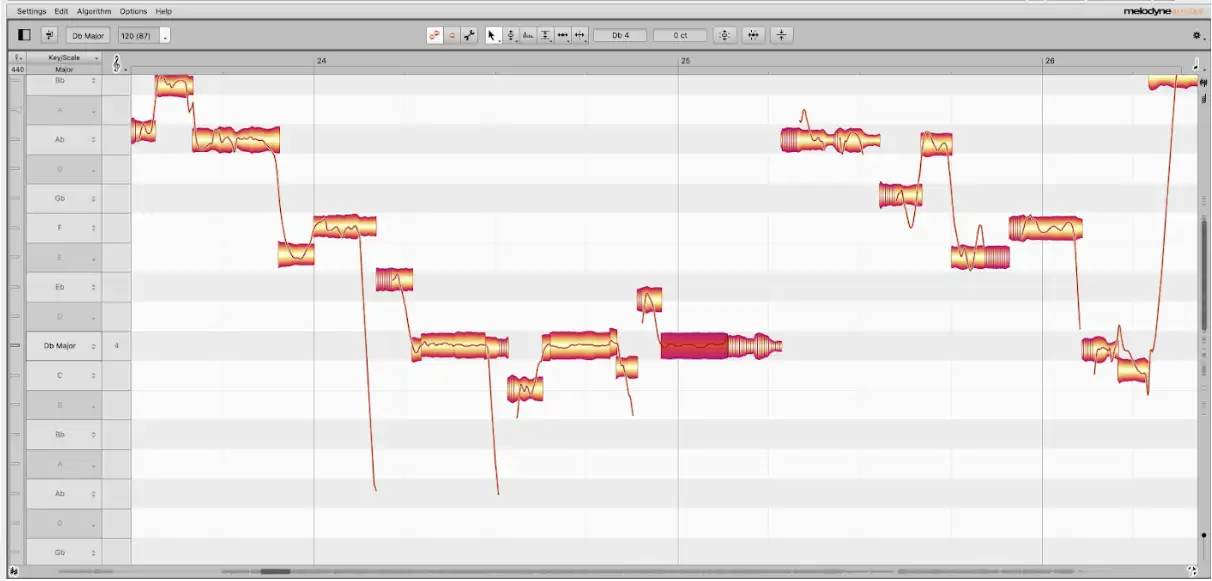
Step 1: Detect and Analyze
First, transfer your vocal track into Melodyne. Once the audio is detected, you’ll see the familiar “blobs” representing the notes.
Step 2: The Scissor Tool
This is the most critical step. Look at a phrase where the singer moves between two notes. Grab the Note Separation Tool (the scissors). You want to physically cut the blob to separate the “meat” of the note (the sustained vowel) from the connection point (the transition).
If you look at the waveform inside the blob, you can usually see where the pitch is relatively stable and where it starts to scoop up or down to the next note. Slice it right before the scoop begins.
Step 3: Tune the Sustain, Ignore the Transition
Now that you have separated the blobs, select only the sustained portions of the notes. You can be aggressive here. Snap them 100% to the grid center. Double-click them to force them to perfect pitch. Because these are the stable parts of the note, the ear expects them to be locked in.
However, leave the small transition slices completely untouched.
By keeping the transition un-tuned, you preserve the singer’s natural slide and “scoop” into the note. The listener’s brain registers the perfect pitch of the sustain, but the subconscious hears the organic transition, tricking the ear into thinking no tuning happened at all.
Step 4: Manage the Vibrato
Once your pitch center is locked, use the Pitch Modulation Tool or Note Drift Tool in Melodyne to tame any wobbliness on the sustained notes.
Don’t flatten it to a straight line (unless you want it to sound like a synth), but reducing the modulation by about 20-30% can help the vocal sit tighter in a dense mix without killing the vibe.
Why This Works for Heavy Music
In genres like metalcore or deathcore, where you might have clean choruses sandwiched between screaming verses, the contrast is everything. If the cleans sound overly processed, they lose their emotional weight.
By manually editing the transitions, you get the best of both worlds: the mathematical perfection required for a modern mix, and the organic grit required for heavy music. Once your tuning is locked in, the rest of your vocal chain—EQ, de-essing, saturation—can work even more effectively. For a complete walkthrough of that entire chain, see how Matt Thomas approaches modern metal vocal mixing on Left To Suffer.
It takes a little more time than slapping a plugin on the insert slot, but the difference in clarity and emotion is night and day.