How Devin Townsend mixes vocals: The parallel delay bus technique
Nail The Mix Staff
Let’s be real, a Devin Townsend mix is a universe unto itself. Dense arrangements, layers upon layers of instruments, and a vocal performance that has to soar over all of it. If you’ve ever pulled up a session like that and wondered, “How the hell do I make this work?” you’re not alone. The sheer wall of sound can be intimidating.
But in the controlled chaos of his workflow, Devin—who tends to trust his ears, not old rules—has some genius tricks up his sleeve. We got a peek inside his actual Pro Tools session for the epic track “Genesis,” and he broke down a killer technique he uses to give vocals space and presence in a crowded mix. He calls it the “Dev Lay,” and it’s a brilliant way to add atmosphere without adding mud. Let’s dive into how you can use this effects chain in your own productions.
Building the “Dev Lay”: The Anatomy of a Vocal Presence Trick
The core idea of the “Dev Lay” isn’t about processing the main vocal track directly. Instead, it’s about creating a dedicated effects bus and sending the vocal to it. This parallel processing gives you a layer of ambience that sits around the lead vocal, giving it a sense of dimension and helping it cut through.
Here’s the step-by-step signal chain he builds.
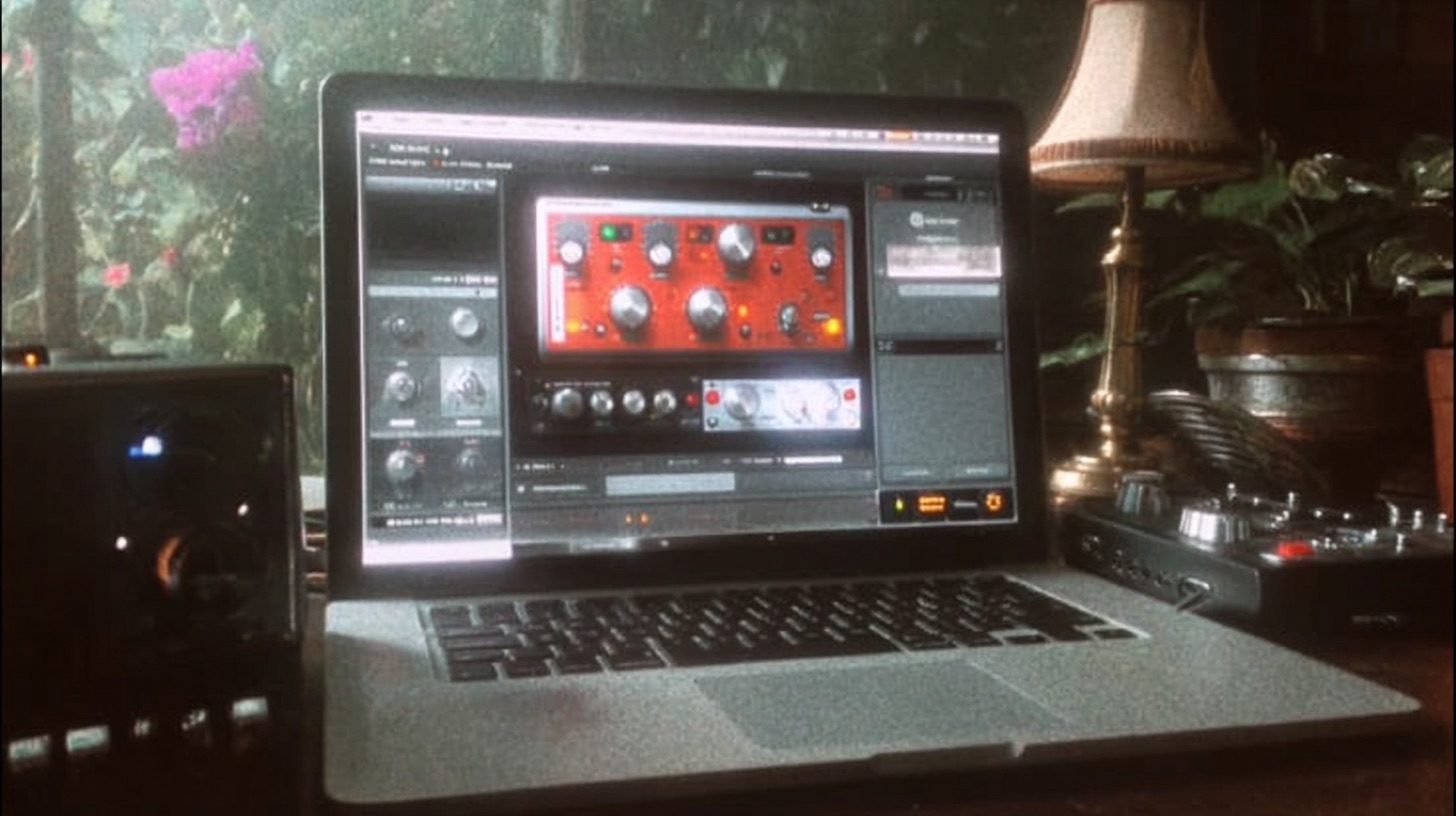
Step 1: An Asymmetrical Stereo Delay
The foundation of the sound is a stereo delay, but with a twist. Forget perfectly synced repeats. Devin sets up an off-kilter, wide stereo field to create movement and a sense of unease that works perfectly for his style.
- Left Channel: Set to 300ms.
- Right Channel: Set to 500ms.
- Mix: 100% wet. You only want the effected signal on this bus.
- Feedback: Crank it. Devin describes it as “shit loads of feedback.” You’re looking for long, cascading repeats that almost verge on self-oscillation. This creates a long, washy tail.
This combination of different delay times and heavy feedback immediately creates a huge, atmospheric soundscape for the vocal to live in.
Step 2: Add a Simple, Low-CPU Reverb
Next in the chain, after the delay, Devin drops in a simple reverb. The key takeaway here isn’t about using the most expensive, boutique reverb plugin you own. In fact, he specifically reaches for a “cheaper reverb” that he knows is light on the CPU.
Why? Because its job isn’t to be the star of the show. The delay is already providing the rhythmic character and texture. The reverb is just there to smear those repeats and wash them out even further, adding to the overall sense of space without taxing your system.
Step 3: The Crucial EQ Carve
This is the most important step, and it’s what separates a pro-level effects chain from a muddy mess. After the delay and reverb, Devin puts an EQ at the very end of the chain.
He uses this to aggressively “scrape a bunch of shit off of it.” Remember, this EQ is only affecting your ‘Dev Lay’ bus, not your dry lead vocal. This allows you to go wild. He carves out:
- Low-End Mud: High-pass the signal to remove any low-frequency rumble that the delay and reverb have created. This keeps the effect from clashing with your bass and kick drum.
- Harsh Highs: The long feedback on the delay can create some nasty high-frequency buildup. Use the EQ to find and notch out any piercing or fizzy frequencies.
This final EQ-carving stage is what makes the trick work in a dense mix. You get all the atmospheric goodness from the effects without any of the sonic baggage that would normally cloud your arrangement.
Step 4: Blend to Taste (with Automation)
Once the “Dev Lay” bus is built, you can send your lead vocal track to it. Devin just brings the fader up until it’s “just a touch,” enough to feel the presence and atmosphere without overwhelming the main vocal. This is a perfect candidate for automation, bringing the effect in more on the tails of phrases and pulling it back during busier sections to maintain clarity.
More Than Just Vocal Tricks: Other Mix Insights
While the Dev Lay was a massive takeaway, the session revealed other nuggets of wisdom that apply to any heavy mix.
Finding and Fixing Problems
At one point, Devin noticed there was way too much low-end cluttering up the mix. Instead of just EQing the master bus, he started muting tracks until he found the culprit: a “Low Synth” track that was adding unnecessary mud. It’s a simple reminder to always diagnose the source of a problem, not just treat the symptom.
Watch Your Buss Compression
He also noticed his Orchestra bus was hitting its compressor way too hard, squashing the dynamics. This is a classic example of why gain staging and compression are so critical. If a track or bus is feeding into a compressor too hot, you lose all control. The solution is often as simple as turning down the output of the preceding plugins or the fader level of the tracks feeding the bus.
See How Devin Townsend Puts It All Together
These techniques are powerful tools you can start using right now to add professional polish and dimension to your vocal mixes. The “Dev Lay” trick alone—asymmetrical delay, simple reverb, and a hard EQ carve—can be a game-changer for creating space.
Genesis on Nail The Mix
Devin Townsend mixes "Genesis"
Get the Session
But seeing these concepts explained is one thing. Watching a master like Devin Townsend actually apply them in real-time, troubleshoot routing, and make a thousand tiny decisions that shape a massive song like “Genesis” is a whole other level of education.
At Nail The Mix, you can do exactly that. We give you the multi-tracks from huge metal songs and let you watch the original producer mix the song from scratch, explaining every single move. If you want to see the full 8-hour session where Devin builds this entire mix, you can get access right here. Stop guessing and start learning the techniques that will help you unlock your sound and mix modern metal beyond presets.